Create Event
In this article you'll learn how to create or copy an existing one.
Attention: Not every eyevip user has the right to add new events. If you don't see the + Event button, please get in touch with your internal eyevip contact or support@eyevip.ch
Table of Contents
Create New Event
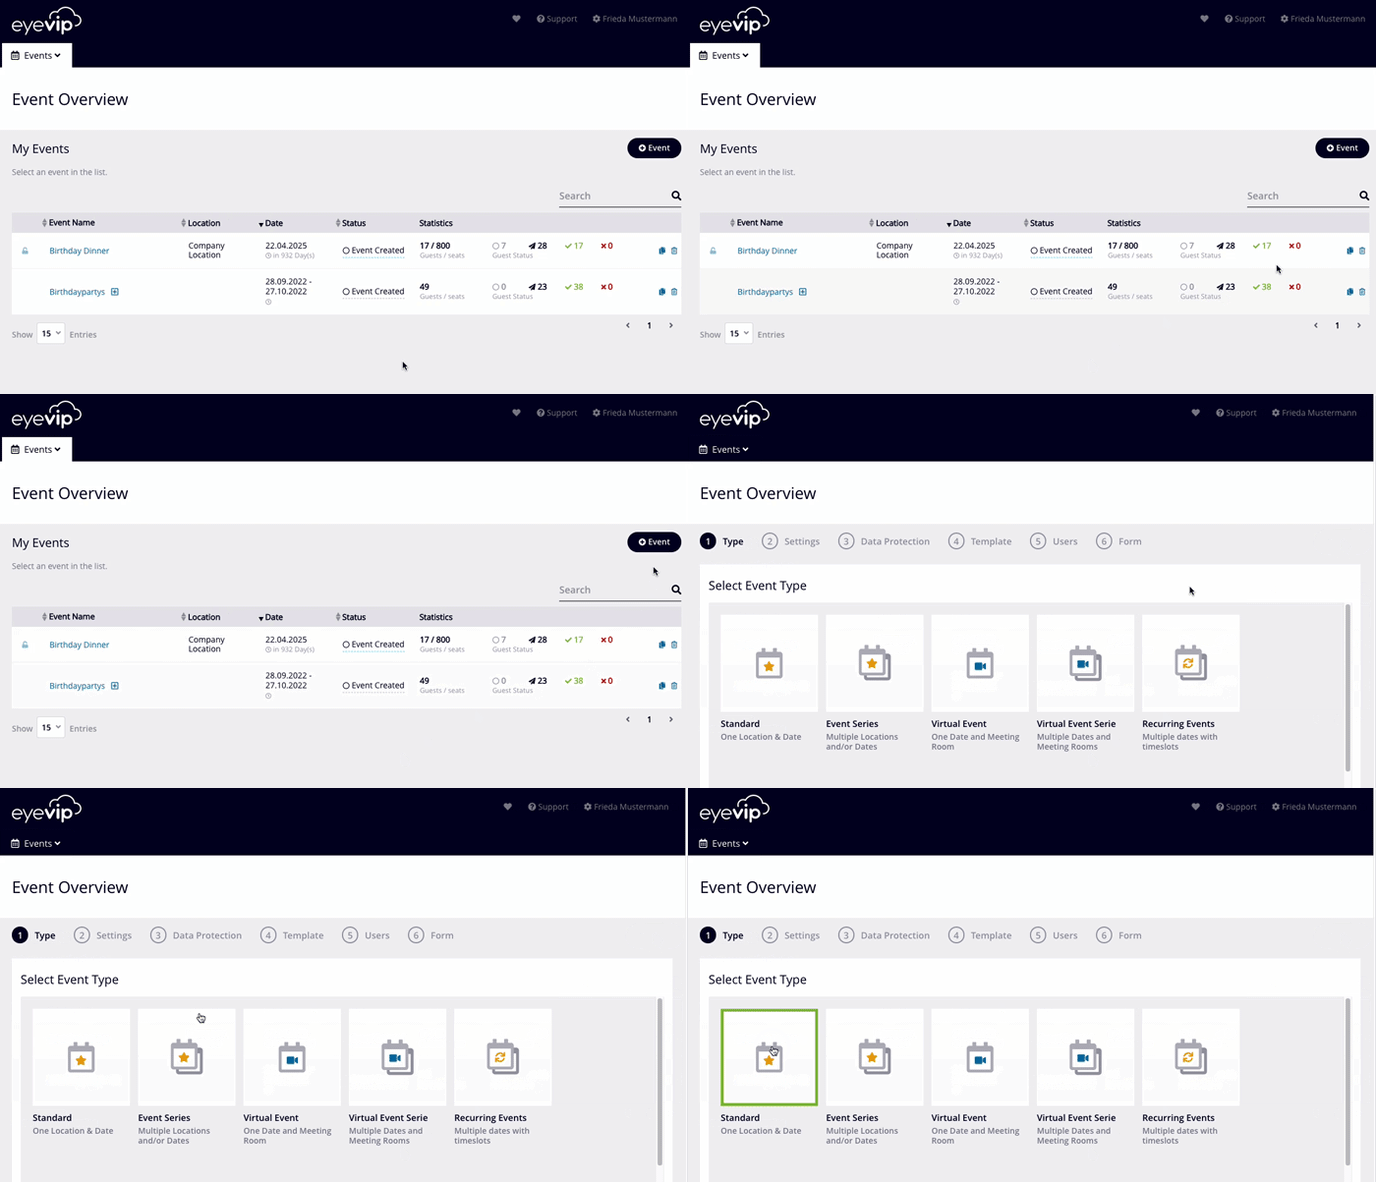
Select the + Event button in the event overview and follow the six steps outlined below:
- Decide on the type of event you want to create and click Next. Depending on your licensing, you'll have one or more event types to choose from:
- Standard event
- Event series
- Virtual event
- Virtual event series
- Recurring dates
- Fill in all mandatory fields that are included in the event settings, such as name, event start and end time, languages, location, registration deadline, etc.
- Decide whether you want to enable the privacy friendly setting.
- Choose the template you want to use for event communication.
- Add all users who are allowed to see or edit this event. For more information, see Assign users to an event.
- Specify the information you want from the guest by defining the form fields. For more information, see Default form.

Copy Event
If you run the same event every year, you have the option to copy the event from the previous year. In doing so, you'll save yourself a lot of time.
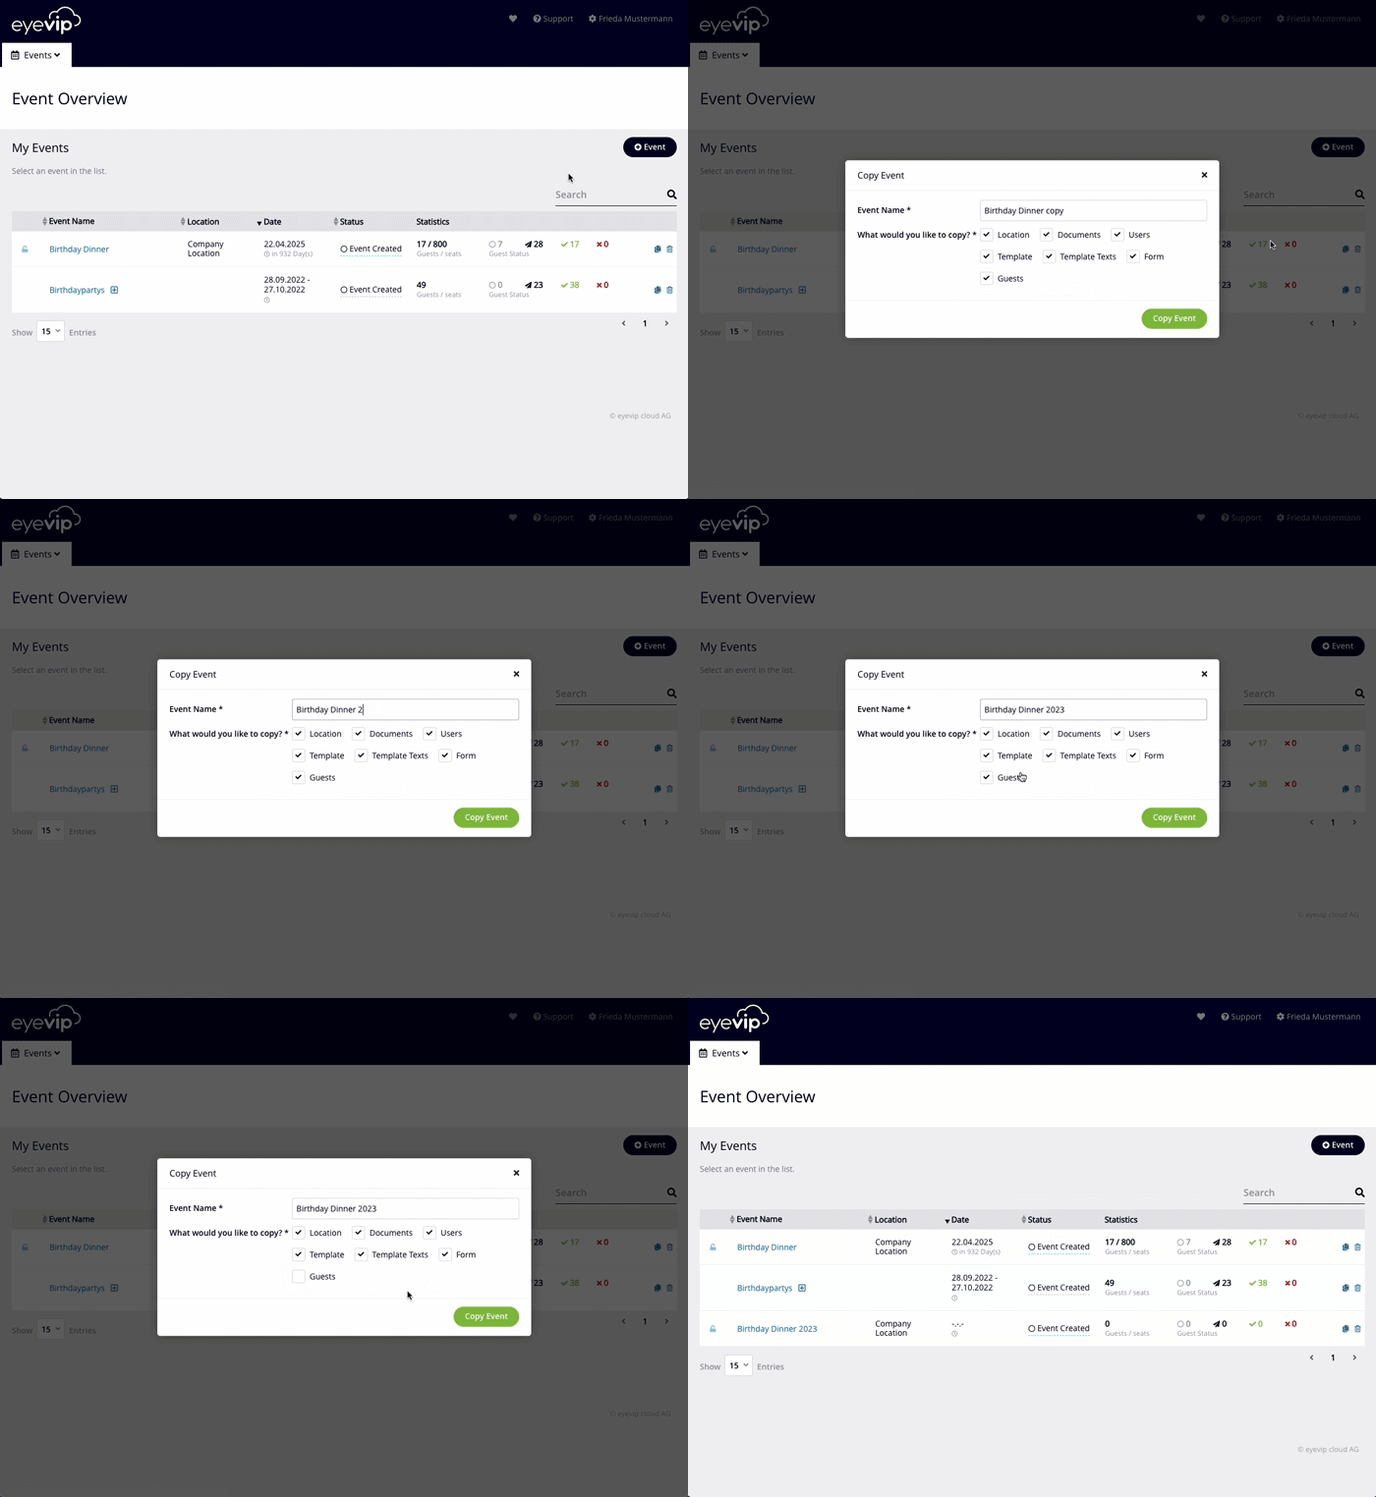
- Click on the blue copy icon in the row of the event you want to copy.
- Give the new event a name.
- Determine which content should be copied.
- Select the new event in the event overview and add the event start and end time and the registration period in the settings.
- Customize the URL for your new event.
- Check all the other settings.

Frequently Asked Questions (FAQ)
Can I change the event type afterwards?
No, unfortunately not. The event must be created from scratch again.