Edit Content
In this article you'll find tips and tricks for editing your event communication.
Table of Contents
Good to know: You can find the described functions in the editor under Communication > Edit content. Just click on the pencil icon of the page or email you want to edit.
Edit text
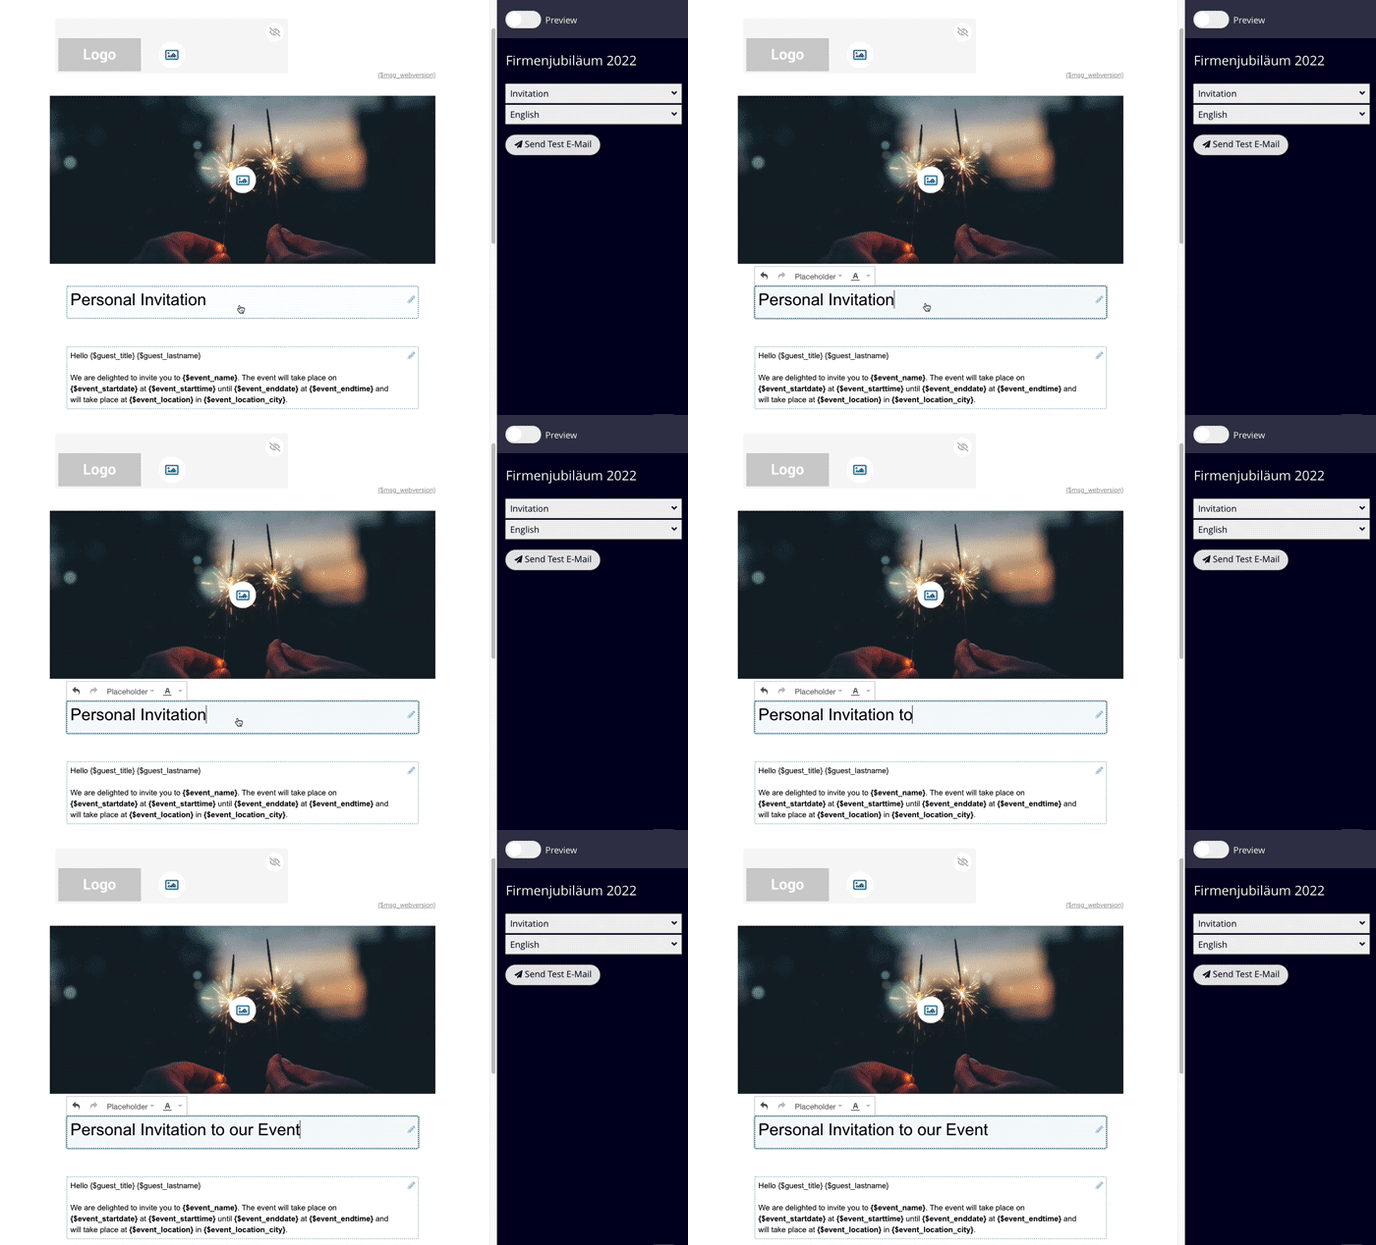
The areas that are editable are outlined by a blue dashed frame and a pencil symbol in the top right-hand corner. Simply click in the text area to edit.
Formatting options
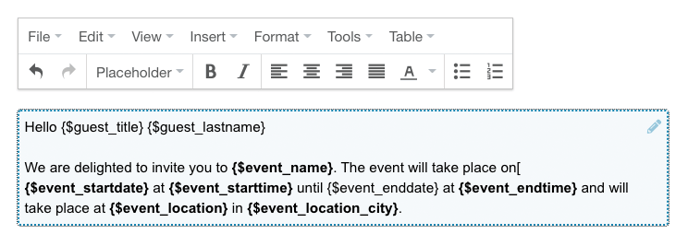
As soon as you click into an editable text area, the Text Editor menu appears with all the formatting options available to you.
Add heading
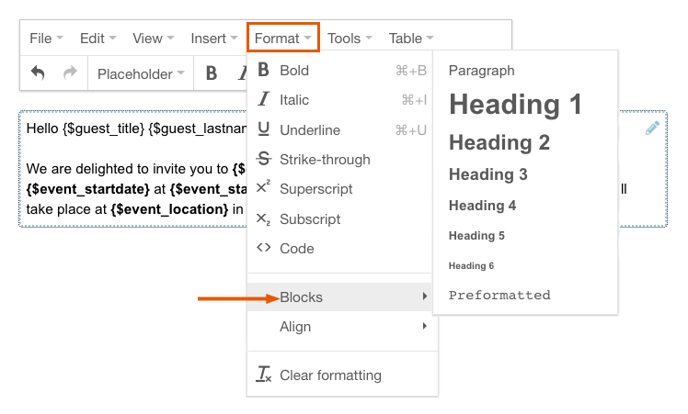
Choose Format > Blocks to integrate different headings.
Add links
Choose Insert > Link to add a link. 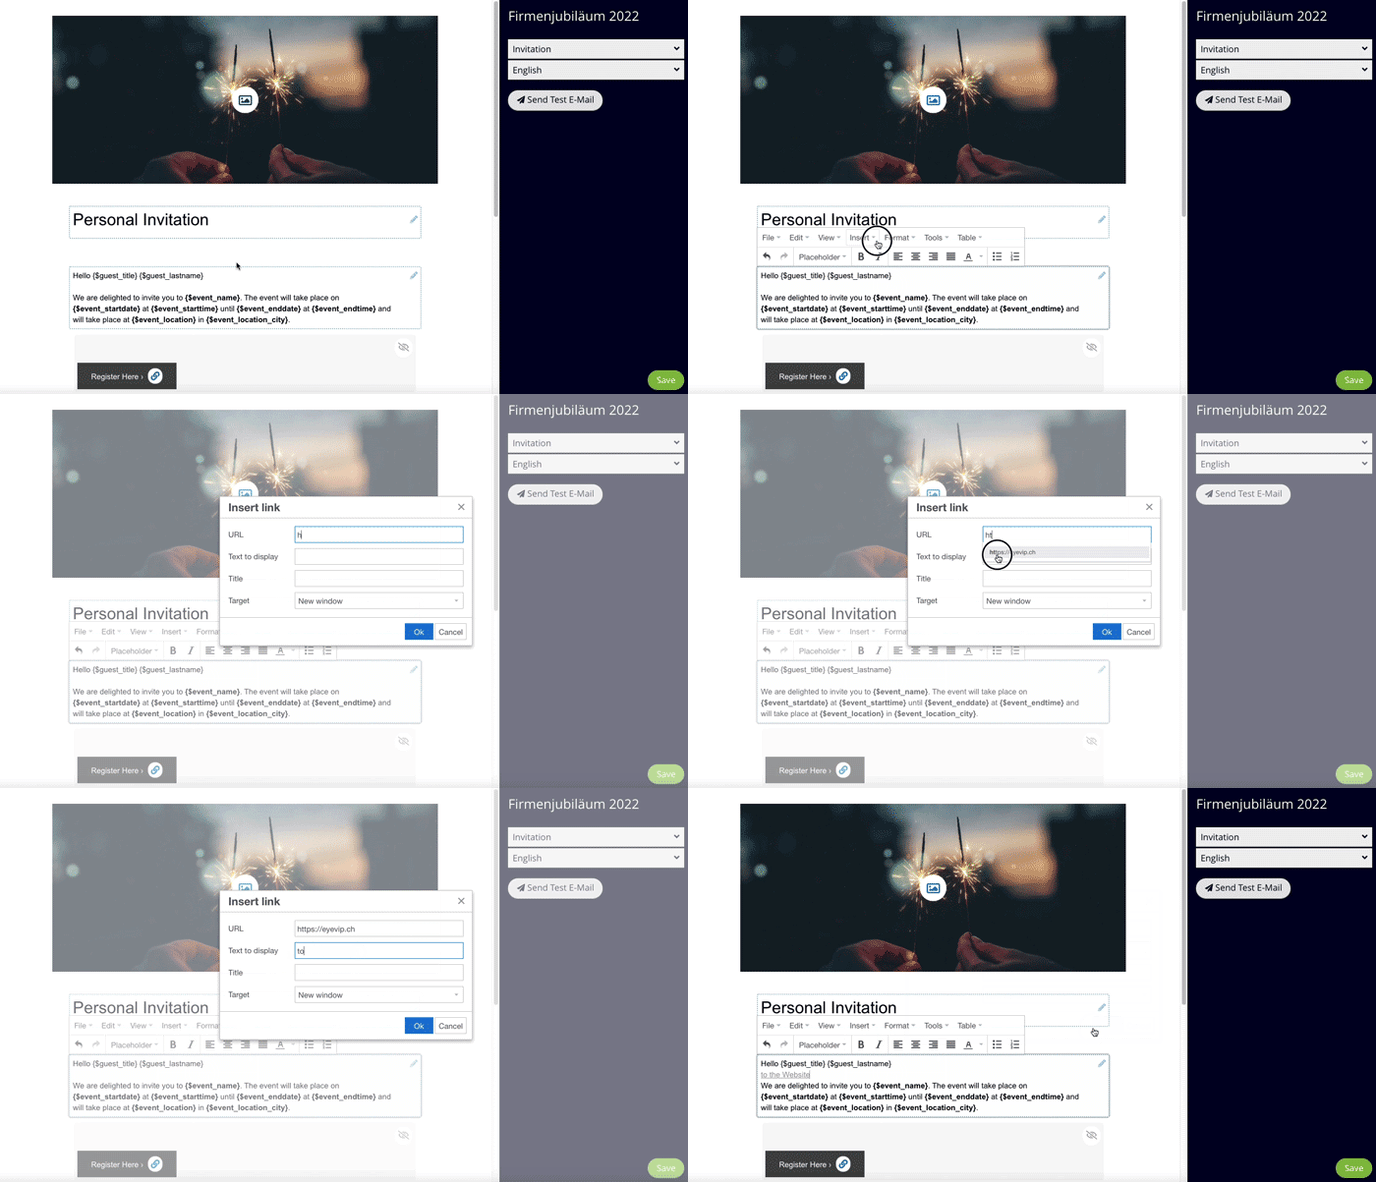
If you want to link to other pages on your landing page, use these links:
| Page | Link |
| Registration form | {$event_url}/index.php?page=registration&key={$guest_key} |
| Info page | {$event_url}/index.php?page=information&key={$guest_key} |
| Image gallery | {$event_url}/index.php?page=imagegallery&key={$guest_key} |
Add link to e-mail address
To link e-mail addresses, you proceed in the same way as for normal links. After you have saved, a window will open. Click Yes so that the link opens the standard e-mail program and the e-mail address is automatically recorded as the recipient's address.
Add documents
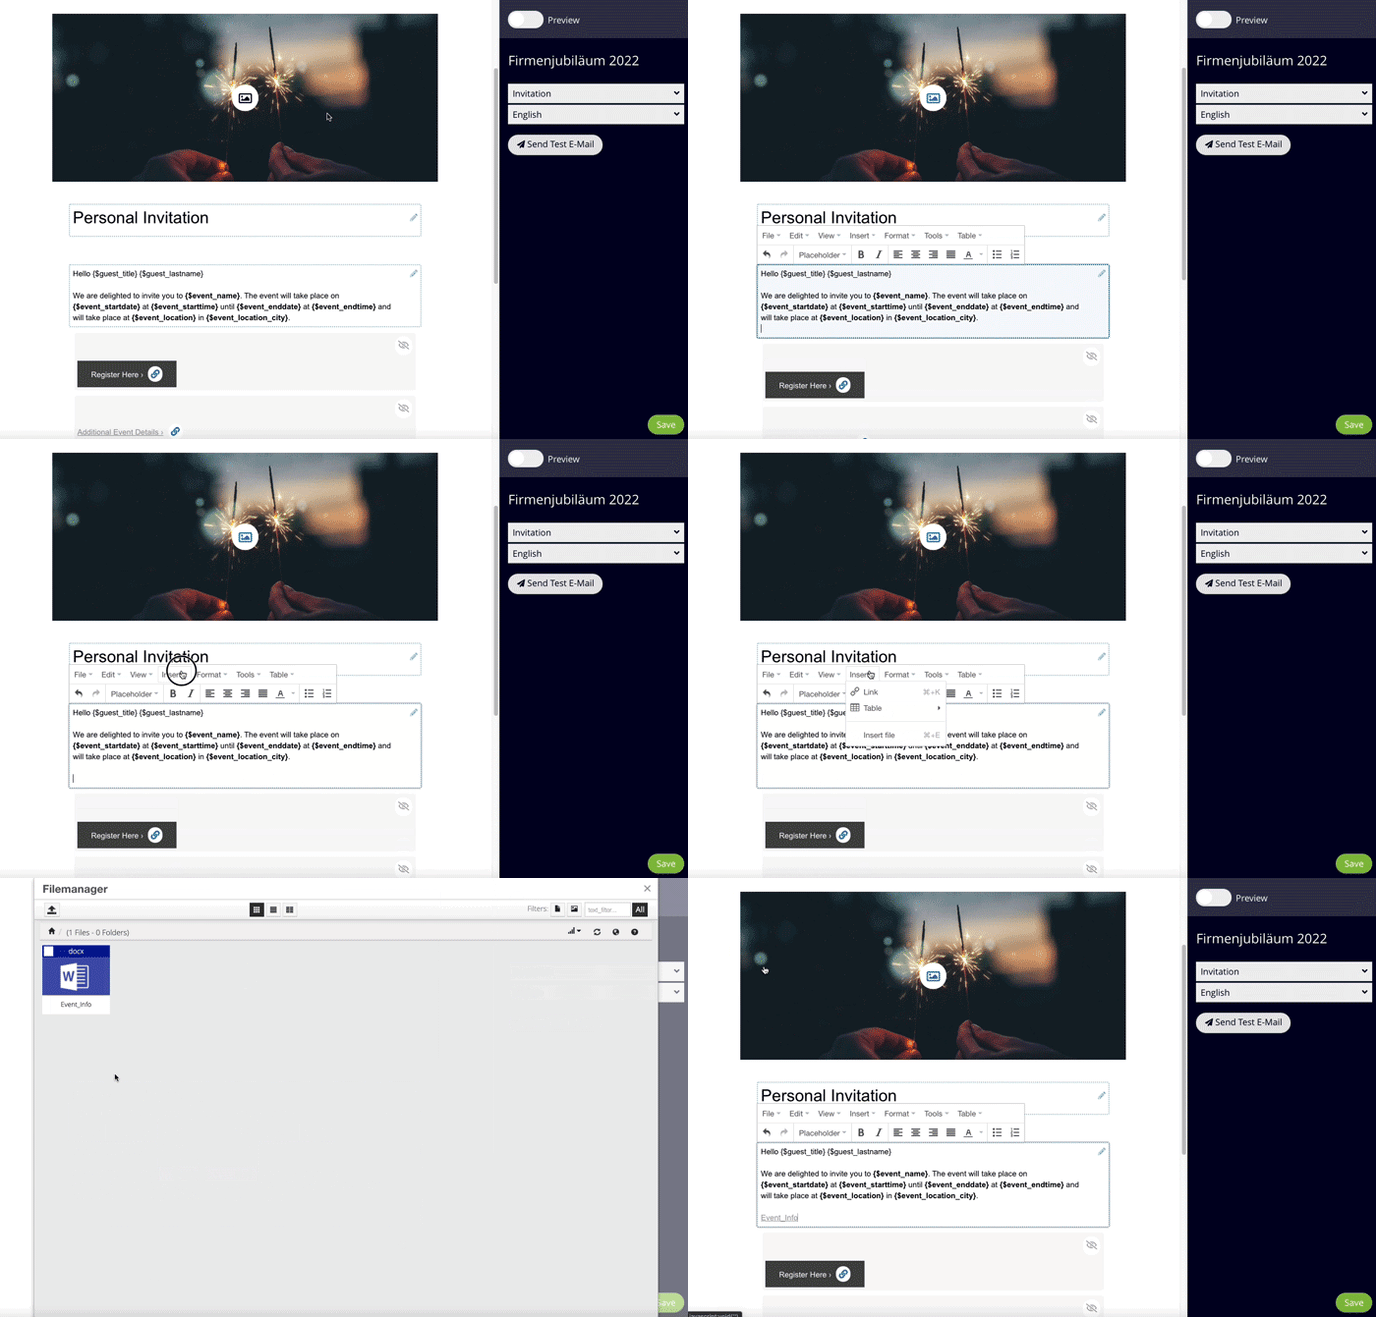
Select Insert > Insert file to upload and link to a document.
Good to know: Your file may have a maximum size of approx. 12 MB.
Insert content with formatting
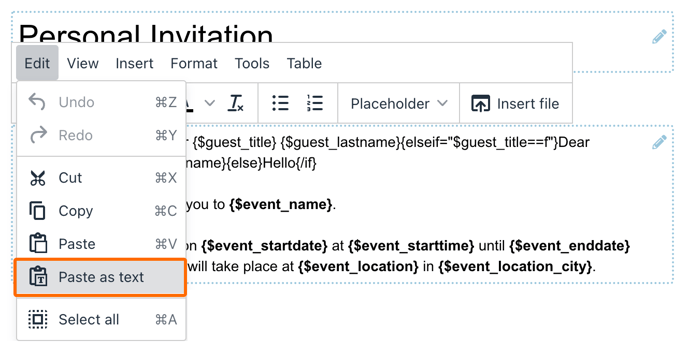
When you insert content from other sources, the formatting is removed by default. This is because formatting from other documents can mess up the eyevip template.
If you want to keep the formatting of a text, for example because you copied the content from another page of eyevip, then uncheck the option Paste as text in the context menu.
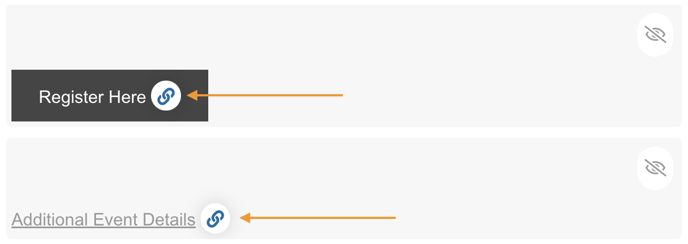
Edit button
Click on the "link icon" to edit the button.
A new window will open where you can make your adjustments. You have the option of editing the text to be displayed and you can change the target of the button link. To do this, select the small arrow on the right-hand side of Link to and then the desired page in the dropdown.
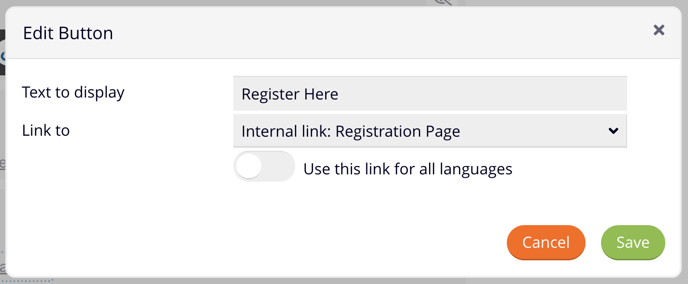
Click on the "Use this link for all languages" button to activate the link for all languages in the event.
Add tables
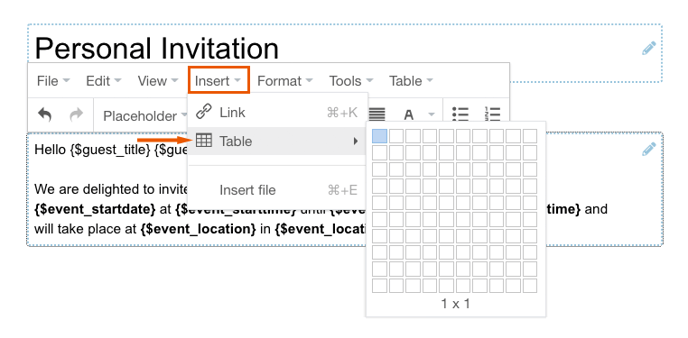
Select Insert > Table to create a table.
Good to know: Tables and lists that are created by you, unfortunately don't always display correctly in emails with every mail program. For this reason we recommend avoiding them in your emails.
Adjust fonts in tables
A font can be displayed incorrectly in Outlook, even if the font is displayed correctly in eyevip. This is because Outlook overwrites the styling of tables.
Follow the steps below to correct the issue:
- Mark the text in the table.

- Under Format > Fonts, save the font again, even if the check mark is already set.

- If necessary, add further formats such as font size, line height, etc.

Add placeholders
Placeholders display values of event objects, like the event name or event location but also guest data, like first or last name. This is why placeholders are used to display personalized content.
A placeholder is signified through the use of curly brackets and the dollar sign:
- {$event_name}
- {$event_startdate}
- {$event_registration_end}
- {$guest_firstname}
- {$guest_lastname}
You can find the list of all available placeholders in the text editor menu under Placeholder.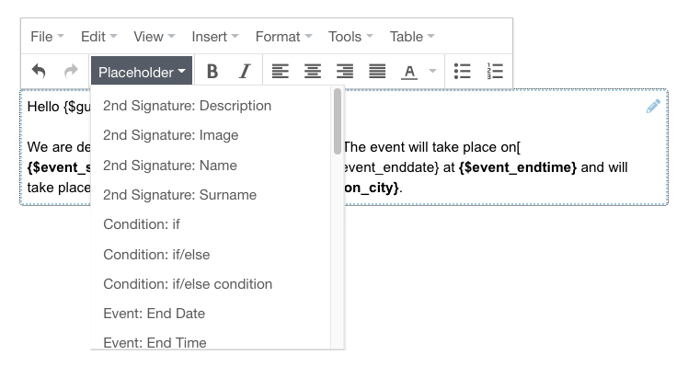
For more information about using placeholders in connection with IF/ELSE conditions (e.g. for the greeting formula), see Personalized communication.
Add images or videos
Replace image
You can recognize editable images by the accompanying image icon. To replace the image, simply click on the icon.
The following formats are supported: JPEG, PNG, GIF
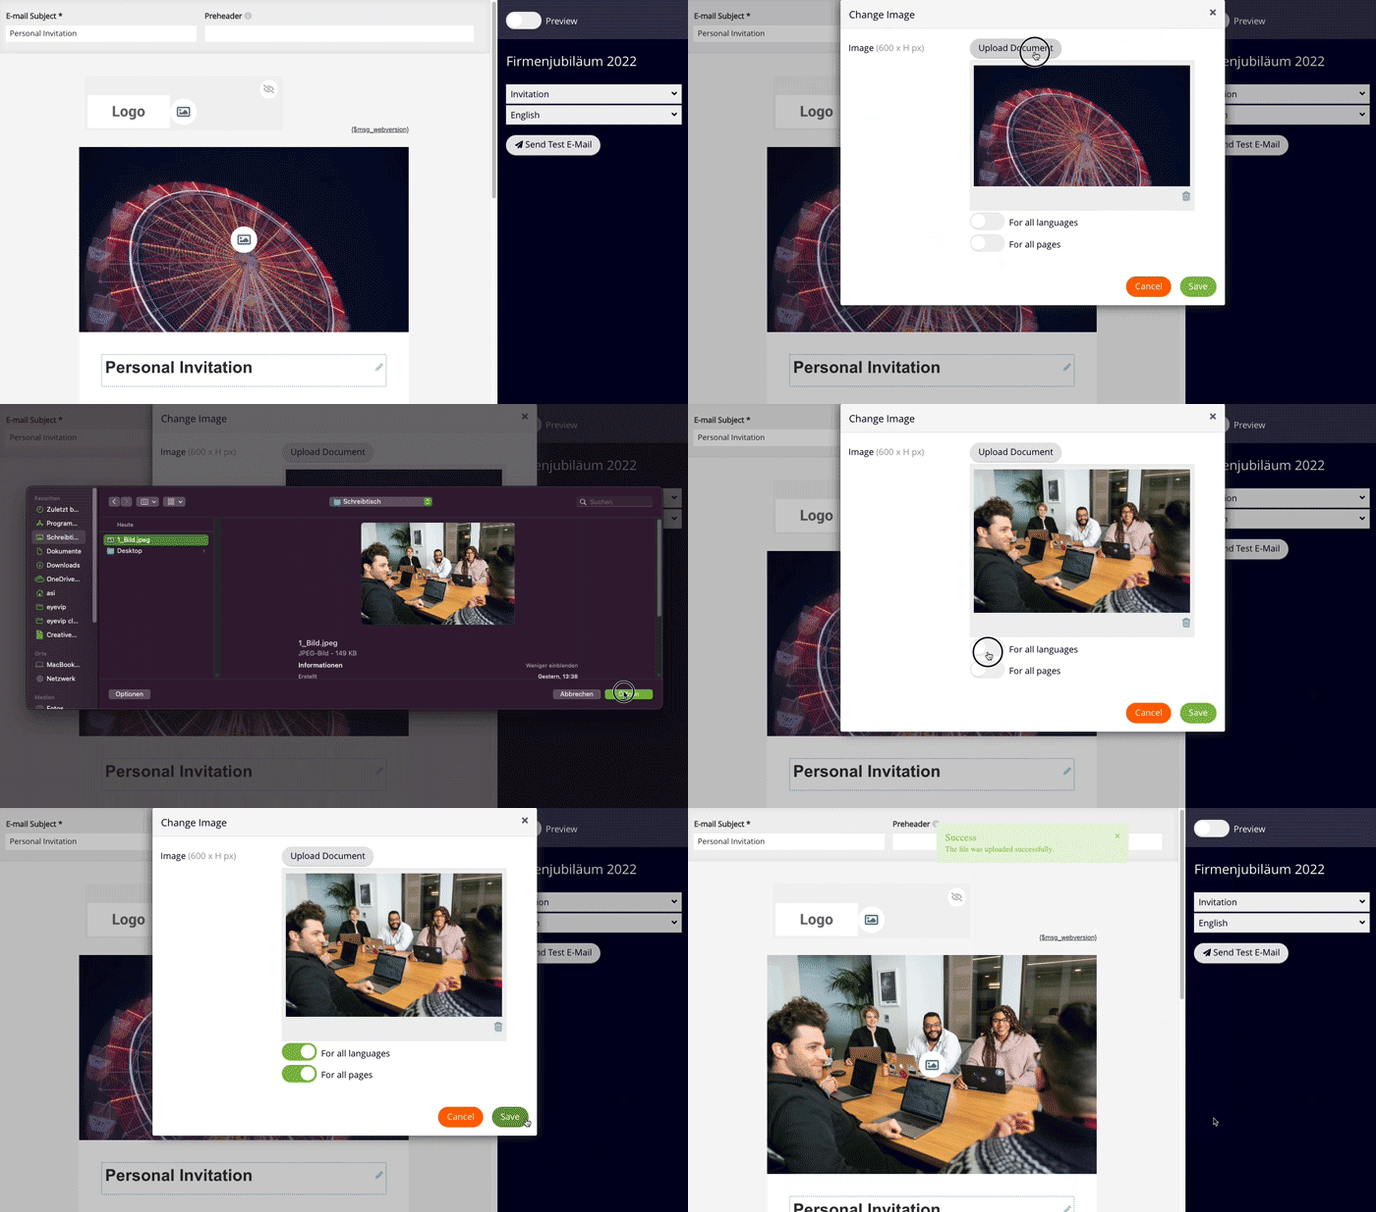
Select the For all languages option to use the image for all language versions.
Select the For all pages option to replace the image on every page or email.
Good to know: If you've changed the image and you still see the old image, it's likely due to your browser's caching. Clear your browser cache or change the file name of the image and try again.
Image formats Header Default Templates
Use a suitable image format for your header in the emails and on the landing pages of your communication. We recommend the following image formats:
| Default Template | Template | Image format |
| Classic | 700 pixels x 300 pixels | |
| Pages | 1320 pixels x 580 pixels | |
| Modern | 600 pixels x 340 pixels | |
| Pages |
1600 pixels x 900 pixels In principle, the format is freely selectable. Please note that the image is responsive and will be cropped depending on the display. The use of text in the image is not recommended. |
Good to know: Your image may have a maximum size of approx. 8 MB. We recommend using the lightest possible images in your emails. Heavy images can have a negative impact on the deliverability of your emails.
Add image
Choose Insert > Insert file to upload and paste an image.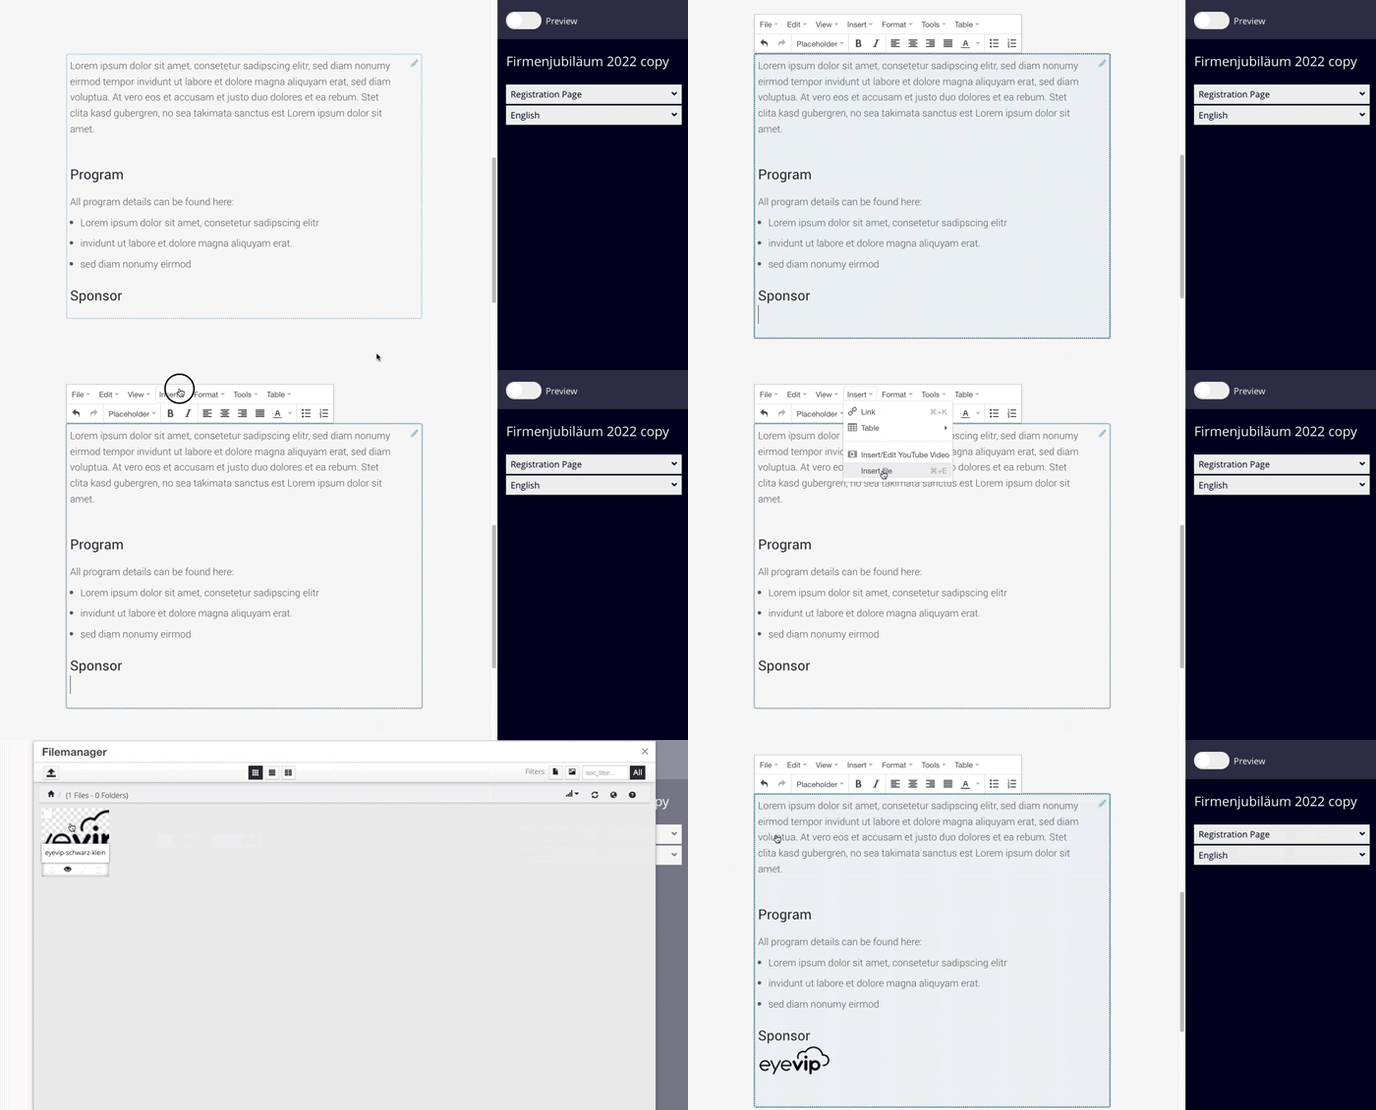
Adjust image size
If the original size of your image is very large, it will be blown up to the original size in Outlook, even if it is displayed correctly in the template editor. We recommend that you adjust the image size.
The simplest solution is to upload the image in the size in which it is to be displayed in the email.
You can also adjust the image using the source code in eyevip:
- Select the image and click on Source code under Tools.

- Style tag
Insert the width and/or height in the style tag:width: [Anzahl Pixel]px;height: [Anzahl Pixel]px;
- HTML attributes
Define the width and/or height as an HTML attribute:width="[Anzahl Pixel]"height="[Anzahl Pixel]"
Good to know: Ideally, you should define the size using a style tag and HTML attribute to ensure correct display in all mail programs.
Add video
Choose Insert> Insert Video to insert a video.
Good to know: For technical reasons, videos can only be added to pages and not in emails.
Add Google maps manually
You can embed Google Maps manually in eyevip.
- Open Google Maps (https://www.google.ch/maps) and enter the address.

- Click on Share

- Navigate to Embed a map

- Click on COPY HTML

- Insert HTML via source code
Note: Hide existing Google Maps or delete them if necessary.
Fade-in or fade-out content
Fadeable elements are recognizable through the use of an eye icon. Click on the icon to hide the whole item. Hidden content is transparently displayed in the editor.

Preview mode
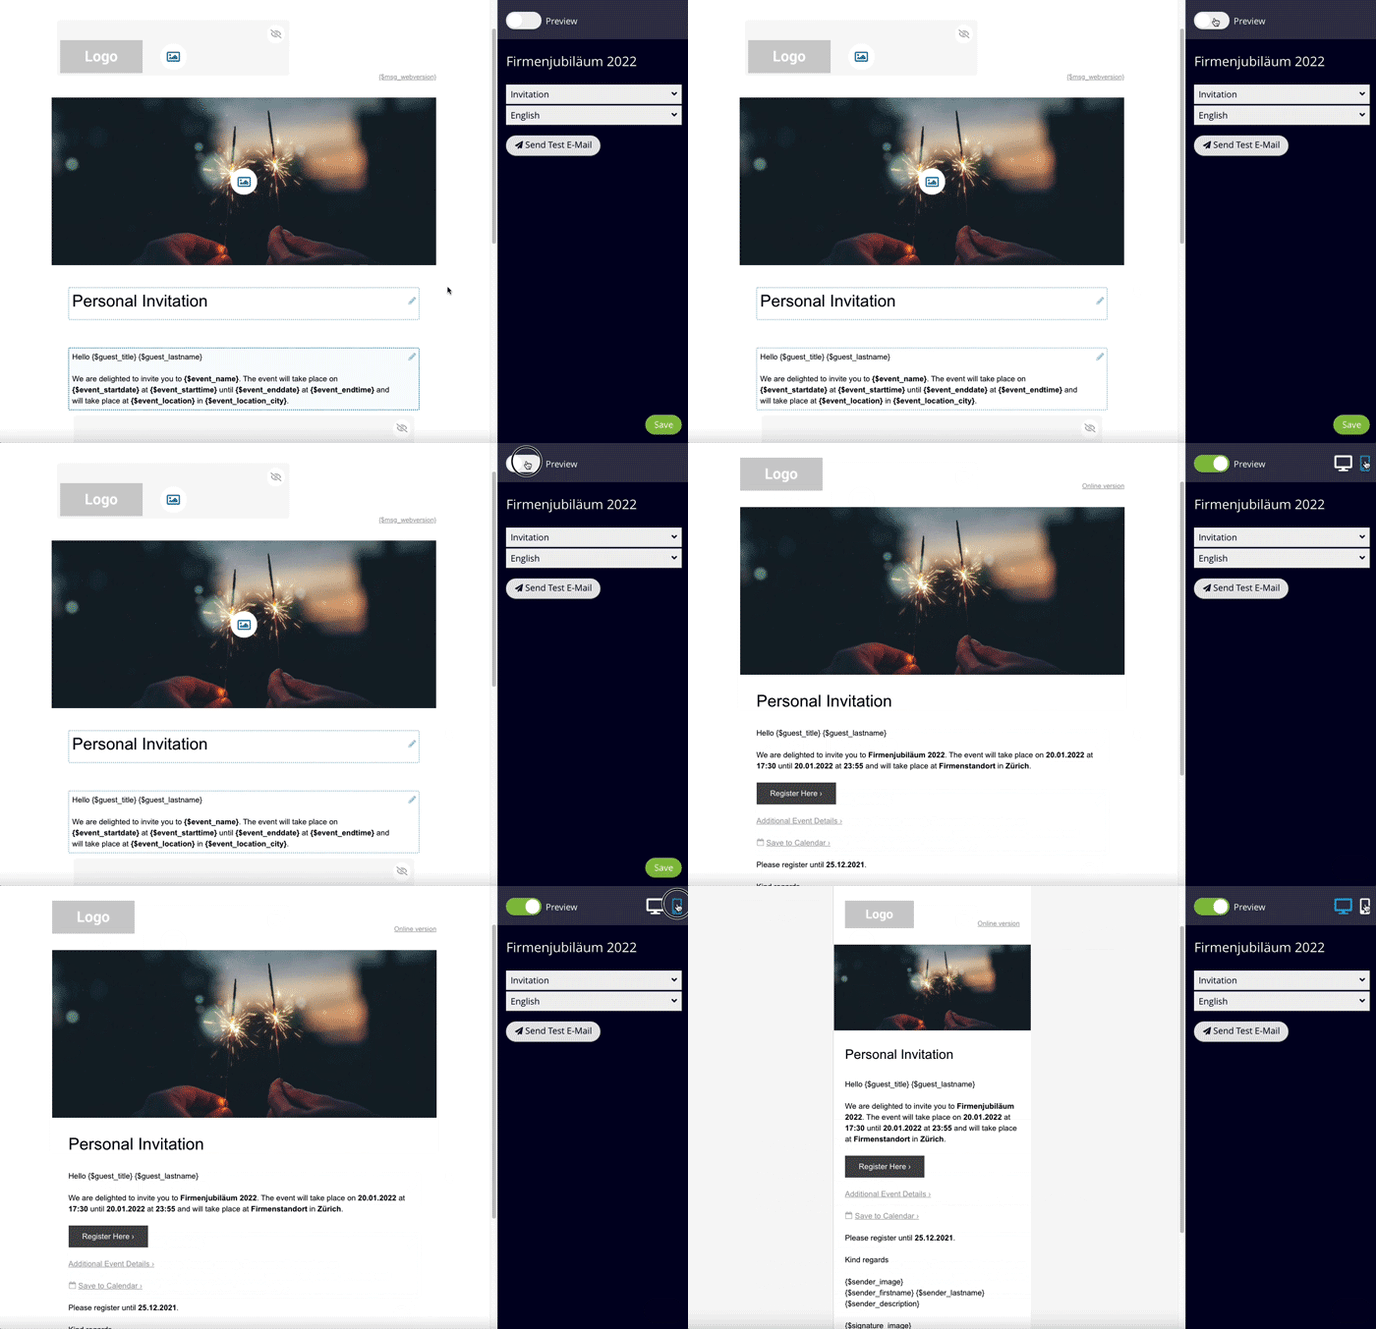
Switch to preview mode to check how your pages and emails will be viewed by guests. With the mobile icon, you can simulate the presentation on smartphones.
