Note: The module "seating plan" is a paid extension and not included in every eyevip license.
Table of Content
Select Seating Plan
You will find the seating plan in your event under Invite > Seating Plan. Seating plans are prepared and uploaded by our team. Contact us at support@eyevip.com if you need a new seating plan.
If multiple seating plans are stored in your eyevip, you can select one of them from the dropdown menu in the left column.

Good to know: The seat allocation is not (yet) suitable for event series because only one seating plan can be stored per event. Furthermore, seats can only be allocated once per event.
Assign Seat to Guests
in the guest list
Go to the guest list of your event and show all guests with the status accepted. Use the filter function for this.
This is how you assign a seat to the guests:
- In the Seat column, select the area, table or row and then the seat number.
- Click on Save.
- Repeat the process for each guest.
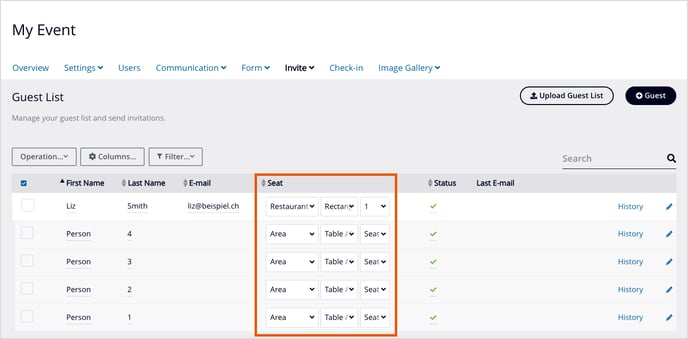
Good to know: If you don't see the "Seat" column, you should show it via the column setting.
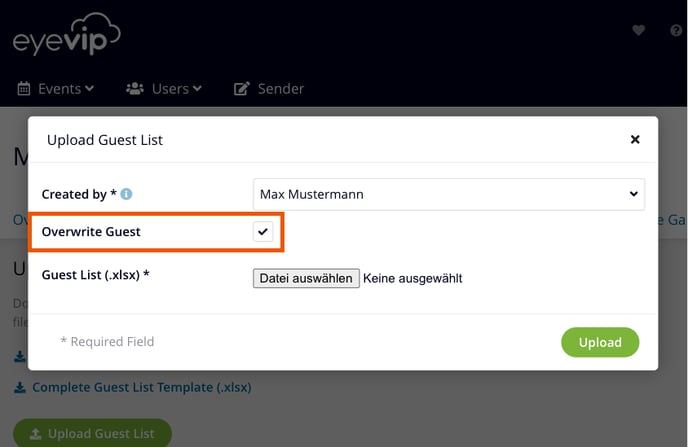
using Excel upload
Go to the guest list of your event and export all guests with the status accepted.
This is how you assign a seat to the guests:
- Fill in the Area, Table/Row and Seat columns for each guest in the Excel list.
Use the visual seating plan under Invite > Seating Plan as a guide. - Upload the Excel list again and activate the Overwrite Guest option.
- Verify the allocation in the visual view.
Verify Allocation
Go to Invite > Seating plan. The occupied seats are marked in color. After the admission control, the seats of the present guests are displayed in a darker shade.
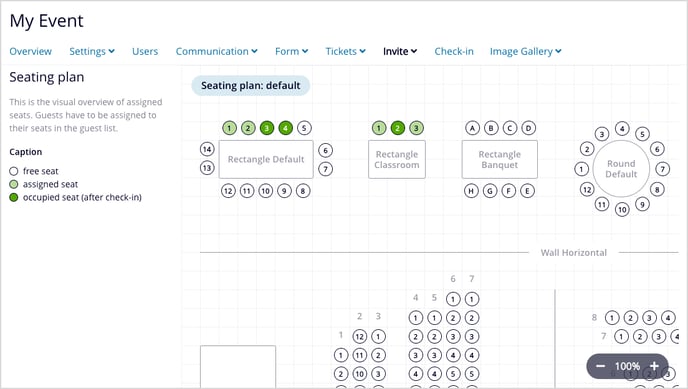
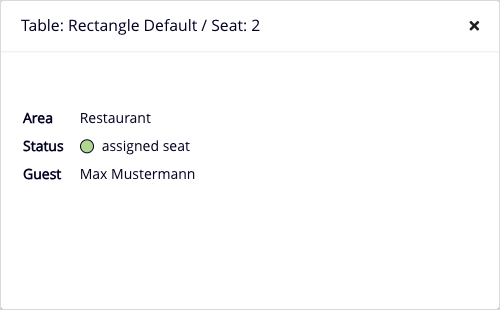
The name of the guest is displayed by clicking on a seat.