
Note: The 'Recurring events' module is a paid extension and is not included in every eyevip license.
Table of contents
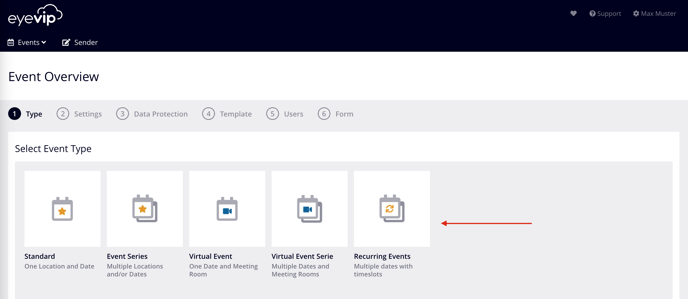
If you want to offer your guests multiple dates that take place at regular intervals, you can use recurring events. This is ideal for vaccination appointments or test drives. The events are automatically created according to your specifications and provided with the desired contingent.
Guests can register for one of the offered dates.
Create recurring events
You create the individual time slots in the settings for your recurring events.
Good to know: If you want to offer events on several days, create a new recurring event for each day so that you have a better overview of the events.
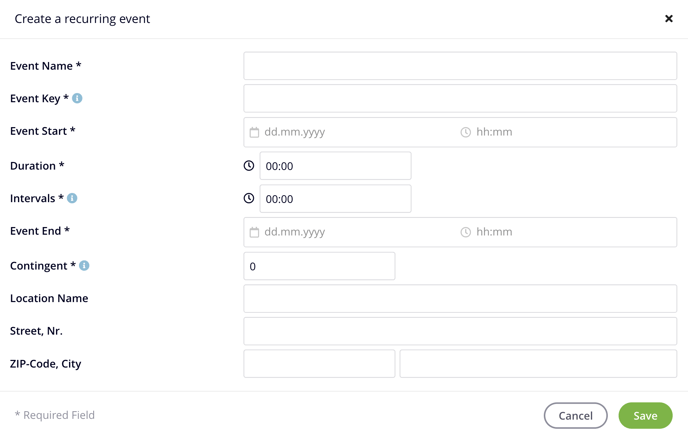
- Enter the event name, event key, event start and end, as well as the duration of an event, the interval (in which intervals the events should start) and contingent for each event.
Location name, street, zip code and location are optional and can be added later. - The event key must be unique, between 8 and 12 characters and must not contain any umlauts or special characters (except for the underscore). The key is displayed in the guest list and used as a placeholder in the communication.
- Enter the maximum number of guests per date including their accompanying persons in the contingent. If the number of participants is unlimited, please enter zero.
- Click on +time slot for the other recurring events and enter the dates.
- You can change the order of the events by clicking on the symbol next to the event name and dragging it with the mouse.
Emails and landing pages
To create individual texts for your events, you work with conditions and placeholders. The various dates are displayed individually in the placeholders.
Find out more under Edit content and Personalized communication.
Guest list
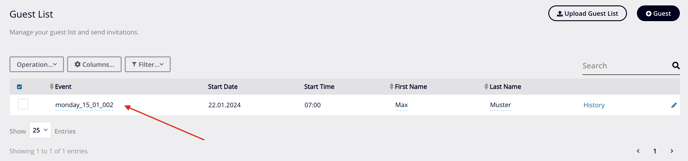
In the Event column in the guest list, you can see which guests have registered for which event.
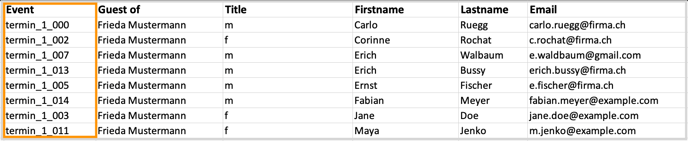
If you export the guest list, the event key from the settings is displayed for each guest in the Event column.
Register a guest manually for an event
If you need to register a guest manually for an event, you can do this directly in the guest list, in the Event column:
- Click on the desired guest in the Event column.
- Select the desired event from the list.
- Set the guest status to "accepted" and send them the "Registration confirmation" e-mail.
Check-in
All guests for all dates are displayed under the Check-in menu.
Click on the checkbox next to the guests name to check them in.
Find out more about check-in here.
Note: Admission for recurring events cannot be processed via check-in app.
Statistics
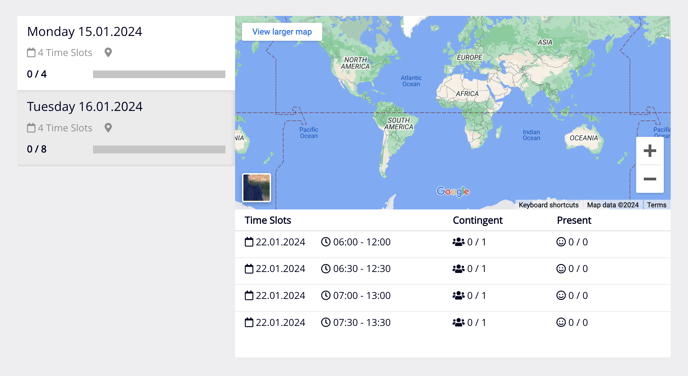
You can see the current status of registrations for each individual event in the Overview menu section.
By clicking on the box for each event, you can see the location and times, as well as the number of registrations already made and how much of the contingent has been used.
Find out more about statistics here.
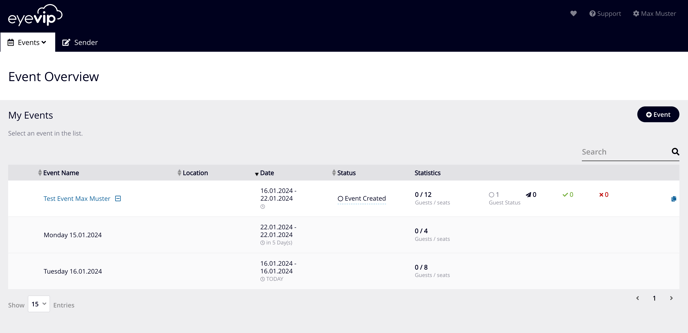
Event overview
In the event overview, recurring events are marked with a plus sign to the right of the name. You can view the various individual dates by clicking on the aforementioned plus sign.
Frequently asked questions (FAQ)
Can guests register for several events?
No, several standard events must be created for this.